Here are the details of how I made my box. I think the total cost of materials was around $30. I ended up buying too many screws/nuts than I needed to, but it was difficult to know what exactly I needed until I started putting everything together. I also used quite a few brass pieces for aesthetics and that's definitely more expensive. I borrowed my roommate's bandsaw to cut a lot of the piece, but you could probably do just fine with a sharp saw. I also used his drill press and end mill to carve out the two slits in the panel. If I didn't have access to a drill press, I would have probably drilled a couple holes and tried to saw my way through.

Here is the front of my easel panel. I don't know what the little blue things are called. I just found them at Ace. They've got a flat circular metal part.

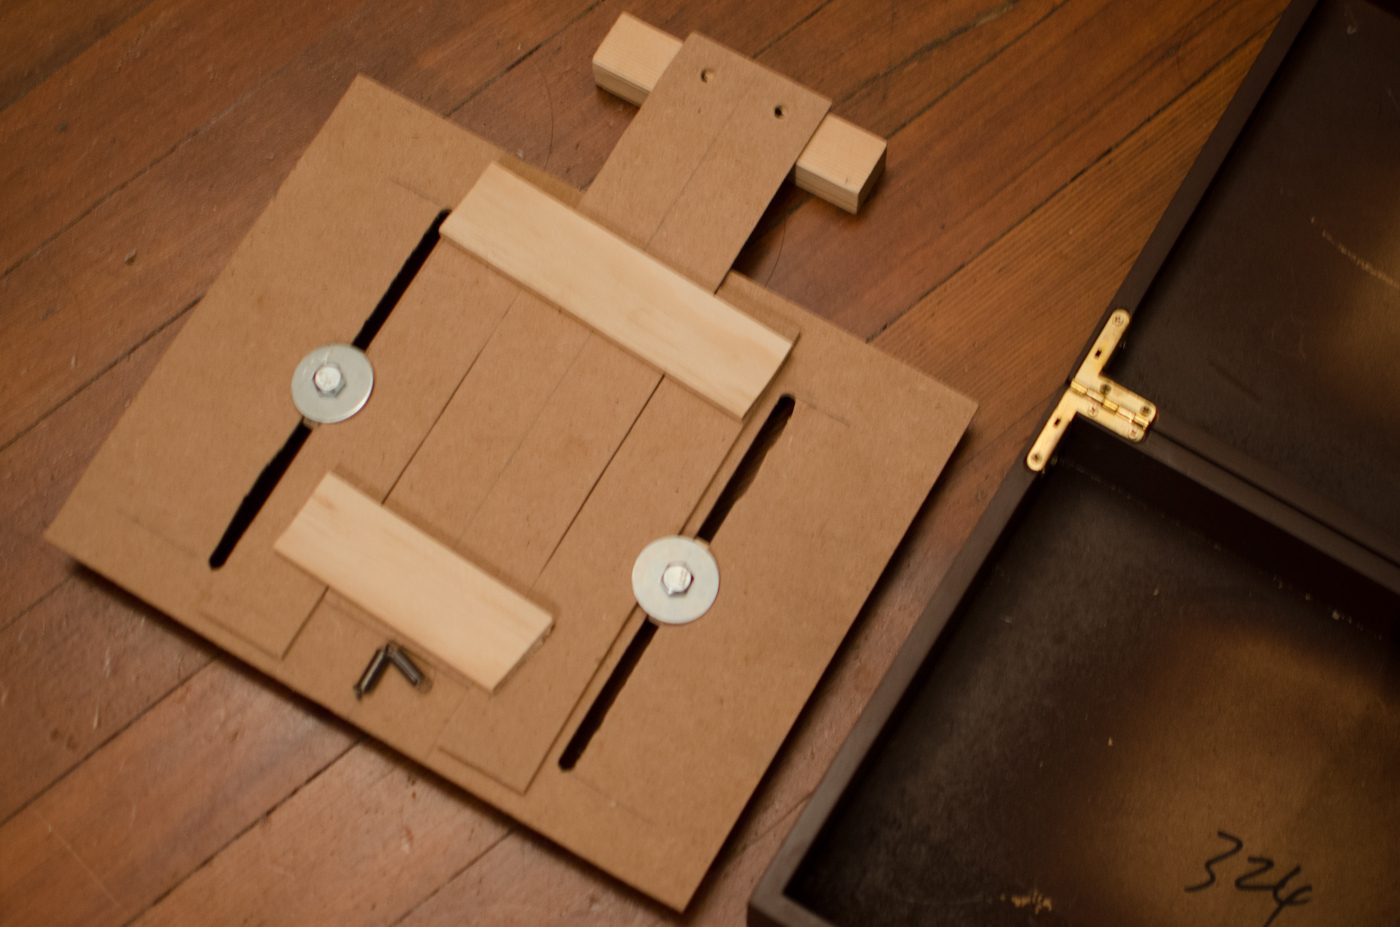
Here's the back of my easel. I glued some small square spacers on the corners too to match up with the thickness created by the spring loaded part to keep the panel from bending.

I've attached a couple small elbow pieces to wedge into the box and also lets me stick a screw through the box and the panel to keep the panel from shifting around.

A close up of the spacers in action. The hole is for a screw to go into and through the easel panel's elbow piece.

This box has about an 8"x10" space on the inside. I got it for free at a gift exchange. I ripped out the original hinges that are spaced out to fit the easel panel I made. As you can see, I failed my first attempt at screwing them in.

I was originally using a brass screw connector for the camera mount, but I screwed it in at a slight angle which was creating some wobble.

I've seen other people use t-nuts so I decided to try it. I didn't get it before because I didn't see how the nut would stay in the wood tightly. Here you can see I've hammered it into the bottom, but I probably should have hammered it from the inside so that the bottom would be completely flat.

I screwed in the camera mount and it wasn't stable at all (because I the mount was not flush with the base). The little hooks pulled out really easily as you can see here. If I had screwed it in from the inside of the box, the act of screwing would probably keep it tight. I'm just not sure if the length of the t-nut and the thickness of my base are the same.

I decided to return to using the brass connector thingy.

For the supports, I just bought a couple box supports. My boyfriend hacked off the extra pieces with a dremel until just the long flat piece remained. I also screwed in a flat piece onto the bottom of the box for it to connect to. I'm using carriage screws and wing nuts to tighten. I have supports on both sides.

I dded a hook to the front, but realized later that it's kind of useless since I can just tighten my box supports to keep the box closed.

I invested a bit more money in the tripod because I wanted something that was super sturdy and robust. I went with the Induro A114 8M alloy tripod. I really like the twist locking action as opposed to the plastic snaps that a lot of tripods have. It packs to be about 19" in length without the head and is 3.3 lbs.

I just found a cheaper used tripod head on ebay that could hold a fair amount of weight, in this case ~ 9lbs which is plenty.

The wood pieces in the box are for holding up my palette since I didn't want my palette to be deep inside of the box. It also lets me keep my paint tubes in there while I'm painting.

I made an extra palette that I could attach with paper clips. This gives me some more real estate to use to put my medium, turpenoid, and mix colors. I covered the bottom of both palettes with contact paper to make it white.

I'm using acrylic for the palette. Works great and is much lighter than glass. My roommate has been using a laser cutter a lot at the Tech Shop and offered to cut my palette for me. I designed a small finger hole to be cut out too. If you don't have a handy roommate or laser cutter at your disposal, Ace Hardware can usually cut acrylic to size for you.


I'm just using a sawed off poster tube here for a brush holder. It's light and sturdy. I'm also planning on using it to store my brushes if I can find a tube slightly bigger or smaller in diameter. If I can't find something like that, a plastic bag and rubber band works too.